As I entered into the decision making process for my next two builds, I noticed an extremely lopsided fact to my last twenty or so builds. In all of those kits, only three have been of the WWII era. It’s not that I do not care for that age of planes. It’s actually quite the opposite. There is nothing like seeing a warbird at a museum let alone hear their raw engines roaring. I very much appreciate and enjoy WWII era planes. Thus leading to my criteria for my next two builds. Criteria number one is that one has to be from WWII. The second criteria is not really a big deal. The kit just has to be from my “to build” list. Both kits were easy choices.
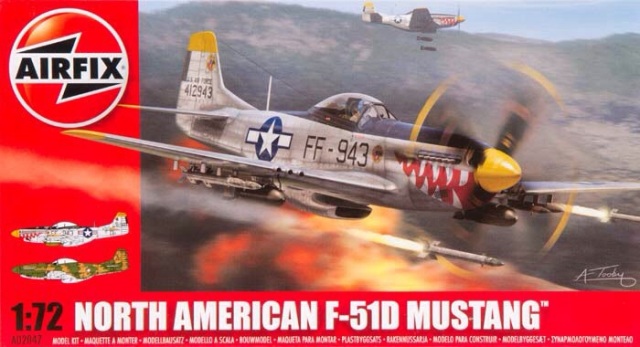
For my WWII pick, I went with Airfix’s 1/72 F-51D Mustang. That isn’t a typo. The “P” designation was changed to “F” after the war. The Mustang will forever be from that era so I’ll let the history lesson slide.
I’m definitely not the biggest admirer of Airfix. I was skeptical in choosing this kit, but let’s hope looks aren’t deceiving. Upon opening the box, you’ll find a great looking kit staring back at you. The moulds are pristine with zero flashing. The weighted wheels are a surprising addition to any kit. Now I don’t have to dip into my True Details resin stash. I haven’t gotten far enough into this build to report any information. It looks like this kit might change my opinion on Airfix.
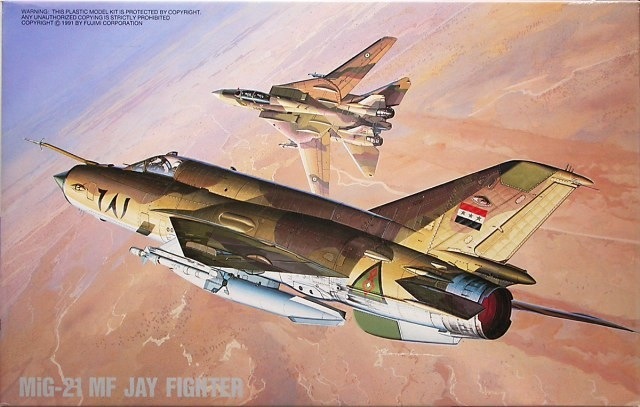
The second build is Fujimi’s 1/72 scale MiG-21 MF Jayfighter. This aircraft has been on my radar for awhile and I’m pleased to finally get the chance to build it.
Open the box and I’m guessing it’s like the many versions Fujimi offers. I have the “Humpback” kit and it’s the same as this one, part for part. The kit looks favorable with nice detail. The decals give you three options to build. I will be building the Iraqi version. The desert camouflage scheme is too hard to pass up. With Halloween tomorrow, I have my parental duties to take my children trick or treating leaving my hopes for some progress for the weekend. A worthy trade off in its own right.
Monthly Archives: October 2013
F/A-18 Hornet
The F/A-18 is finally complete and I am quite content with the finished product. Hasegawa, once again, put out a superb kit.
Assembly went in the typical fashion with no hang-ups to report. I must say, I was apprehensive with the painting. I could have used decals for the blue on the spine and vertical stabilizers, but I have terrible luck with decals that have to conform around curves. I try to use paint everywhere possible instead of a decal. I left the vertical stabilizers on the sprue which made it extremely easier to work with. I sprayed both with Model Masters Blue Angel Blue. Next, I masked the spine off and shot the rest of the plane with Model Masters Dark Ghost Gray. After a day of drying, I applied the decals. Another day of letting the decals set and I began weathering and final assembly. I sealed everything up with Testor’s Flat Clear and done.
This was a great build. No stress to it at all. My apprehensions on the blue paint were admonished quickly and I learned a few things from it.
F-117A Nighthawk
It was tempting not to change direction with the paint scheme on this one. While the typical flat black is sleek and mysterious, I held my ground and stuck with the original plan. Now that I am finished, I’m glad I didn’t give in.
This kit could be built in a weekend if you put the effort into it. Great fitting parts were a pleasure to deal with as well as good detail. As for the decals, Two Bobs produced a great set as usual. The sheet contained enough decals for four different aircraft. I picked these up for $3.00 on clearance which makes it even better.
I highly recommend this kit. If you’re looking for a kit that’s easy to build but still on the challenging end of the spectrum, this is the kit to build. I have another one of these in my sea of kits that I might have to dig out soon. There is still the iconic black scheme along with another grey scheme to add to the shelf.
Finishing Up
I have been working quite diligently lately on my two builds with rewarding results. I must admit that the accompanying pictures are deceitful. I took them a few days ago not expecting to be as far as I am. But they help tell the story of the builds.
The F/A-18 build went well. There was some confusion in the directions and some odd fitting pieces. I can forgive that and say this was a good kit. I have completed the painting process and it sits awaiting the decal application. I’ll probably wait to start until the F-117 is complete.
The F-117 was also pleasurable. There’s not too many parts to deal with which makes it an easier build. Assembly went as expected. The only filler required was at the wing roots and even that wasn’t much work. On a side note, I left the sprue connected to the nose of the fuselage to protect the pitot tubes from getting damaged. My last Stealth had that unfortunate fate. The F-117 should be complete in a couple of days, time permitting. It has been painted and the decals have been applied. All that’s left is to weather it a bit and do final assembly.
American Airpower
I do realize that it seems as though I have a bias for American airplanes. I guess in some ways I do. As with all things close to home, I grew up seeing these planes at air shows and museums. I have nothing against “foreign” planes, I just gravitate towards the products of my home country.
My next two builds both were impulse selections. I have chosen to build Hasegawa’s F/A-18C Hornet “Golden Dragons” kit along with Hasegawa’s F-117A Nighthawk kit.
I actually started the F/A-18 at the tail end of my last two builds. I plan on building it straight from the box with a little added cockpit details. It looks decent so far. I haven’t indulged too far yet to notice any alarm bells.
I’ve been planning an F-117 build for a little while and finally decided to forego it after looking through my after market decals. I bought a set of clearance Two Bobs decals about a year ago with the intention that someday I would use them. On the sheet includes markings for the Grey Dragon scheme. As the name states, it’s a two tone grey scheme and not the typical flat black that all other F-117 wear. I’m a huge fan of the F-117 and of unique paint schemes. Put the two together and we have a winner. Aside from the decals, I also will be using a set of resin wheels. Other than that, all else will be from the box. This build yields very few parts so it should be a speedy one.
The Hun
The F-100D Super Sabre is complete and has found its place on the shelf. I am quite pleased with the end results. Trumpeter hit this one out of the park. I had no issues with construction until final assembly when I misplaced the instructions. Luckily I found them online. I figured I would find them as soon as I was done but they are still missing in action.
I chose to depict this one in the Vietnam era SEA scheme. With that, I had to ditch the provided sidewinder missiles and use a few 500lb. bombs and ejector racks from one of Hasegawa’s weapons sets. Everything else was built straight from the box.
I tried a set of Cam Pro decals for the first time with this kit. The finished product looks good, but they are very delicate to work with. Also, they are printed on a continuos film resulting in having to cut each decal out from the others. These downfalls led me to only use the decals for the vertical stabilizer and one for the nose. The rest of the decals were from the provided Trumpeter sheet.
This kit has been on my “to build” list for a long time. I am happy with my results and to finally be able to check it off the list.
Do 335A-1 Pfeil
It seems as though I have my own version of the fabled Tortoise and the Hare story. I started my Do 335A-1 Pfeil (the tortoise) and my F-100D Super Sabre (the hare) at the same time and I was certain I would be finished with the Super Sabre long before the much neglected Pfeil. I quickly advanced with the Super Sabre, flying through the build. As with the Super Sabre, I found a good rhythm with the Pfeil and kept with it. As it turns out, I surpassed the Super Sabre and now I’m finished with the Pfeil.
Construction went well with no major problems to hinder anything. DML did a fair job with this version. The decals were a little hard to deal with. They were thin and took an unusually long time to release from the backing. I managed to conquer these issues with no headaches and I think the finished kit turned out well.
Ready For Paint
Things with the Super Sabre and the Pfiel have been going well lately. Time has been my enemy with no fault to both kits respectively. As a matter of fact, both kits are ready for paint. I’ve started working on the F-100’s infamous discoloration of the engine housing. I used Model Masters Metalizer Burnt Metal for the base coat. After the base coat dried, I used Model Masters Metalizer Burnt Iron to highlight the ribbing on the fuselage. The final detail was the blue-ish over annealed look. Luckily for me, I work in a steel mill and know first hand what this looks like. I mixed two parts Testor’s Silver with one part Testor’s Dark Blue. For this detail, I lightly went over the burnt iron. Not too much, but just enough to see a difference. This was my first time using the metalizers so I hope I did it correctly. It was fairly simple to use. I didn’t need to thin down anything. The only downside is that you have to use a special kind of thinner. The results make it well worth it.
As for the Pfiel, it sits waiting for some attention. I flew through the F-100 so quick that I didn’t stop to work on this one. When I finally made time to build, I was pleased with the results. Other than thin parts, DML has won me over. The Pfiel has been a good build. I forgot to add nose weights which led to some surgery. It’s always the nose weights with me! Aside from that, it’s next in line for paint.


