Keep On Keepin’ On

Trying to stay in the model building mode, I am taking on any project that I can to further these build along. The F-16 and F-15 really need to be completed and I plan on addressing that soon. In the meantime, the F-22 was first up.

Not a whole lot completed with the fuselage halves being affixed to each other. My little hiccup with the intakes resulted in a bad fit. So filling and sanding will take place next.

The Focke Wulf saw its underside and engine cowling get sanded yesterday. The port side wing had a horrible fit so I broke it loose and made some adjustments. Primer will be the next step here and we will go from there.

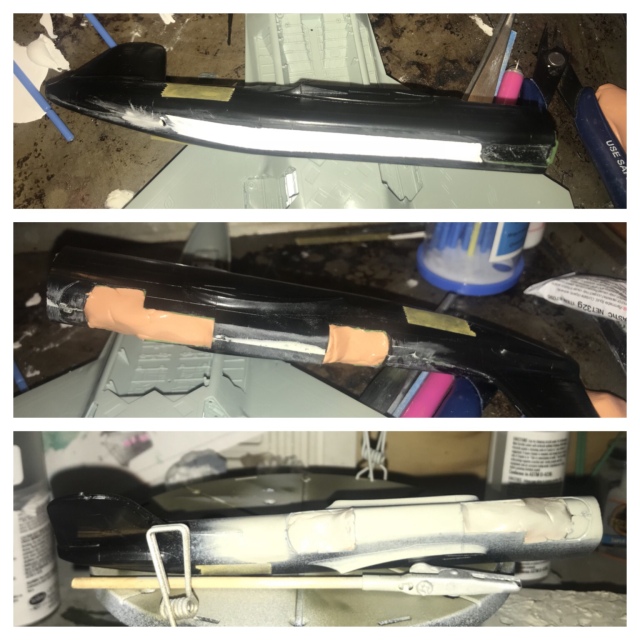
Revell has given me a project in the P-70. It’s been a good lesson in sanding, I guess. The spine of the fuselage was sanded yesterday and wasn’t on par in any sense. Another round of filler was in order which was promptly applied after the belly was sanded down. I am hopeful that the primer will show positive results on the belly so I can focus on the spine. The wings will be an upcoming addition here soon. I expect some resistance and I would like to face it as soon as possible.

Follow Instructions

As a somewhat seasoned model builder, I tend to take the instructions as a basic guide. I am confident that “I know” what I am doing most of the time and that pride in myself has steered me into a pickle. I didn’t have a whole lot of time to devote tonight at the workbench which was a bummer. Playing the part of responsible home owner by mowing my lawn was first on the agenda when I got home from work.

Second on the list was getting a little farther with the F-22. The fuselage halves were what I really wanted to get joined together tonight. The lower half of the nose section needed to be attached to the rest of the lower fuselage half before I could get started. Or so I thought! While trying the ever important dry fit, I noticed that the nose section could not be attached as it was intended to. Going back and studying the directions, I observed that the air intakes are to be installed AFTER the nose section. Doh! Lucky for me, the intakes came out with some ease and with my tail tucked between my legs, I proceeded to do things the right way.

While I didn’t get exactly what I wanted to get accomplished, I am very thankful to move past this hiccup with somewhat ease.

Lets Try This Again

I’m not sure what it is lately but I just can’t find the time to get my butt moving on the mass of unfinished airplanes that adorn my workbench. When I do manage a few moments, I can’t muster up the motivation to actually sit down and pursue my ultimate goal of finishing them. The intentions are there and good, so I have decided to re-route my priorities.

The F-16 & F-15 builds have received the royal treatment for too long, creating a sort of motivation vacuum of sorts. I am not thrilled with how they are turning out and I just can’t seem to get a flow going. They are both in final assembly which shocks me that I can’t get them finished but it’s time to let them sit until I can be happy working on them again. Until that happens, I have three other builds that are desperately awaiting some progress.

With my new course set, I began with the Focke Wulf. We have some work to do with this one and I have a solid game plan in place. The lower halves of the wings were the last thing to be addressed so I picked up there. The upper halves were attached with some angst and a lot of adjusting. They’re on and I can work with them now. The seam in the nose was also sanded and I will get some primer on today. Depending on the outcome of my sanding, I will flip the aircraft and work on shoring up the imperfections of the wing installation.

The P-70 and its mile of sanding was next up on the workbench yesterday. The upper seams look like I can pass by soon. The lower seam is going to be a project. Lucky for me, I have played this game before. I refilled the lower seam and covered the cockpits with Silly Putty. From there it was out to the garage for primer. I will bring it in this afternoon and get back to sanding.

The F-22 was last on the workbench docket for some much-needed interior assembly. The wheel bay, air intakes, engines, and weapons bays were assembled and installed. Academy really showed up with this kit. There are plenty of builds within the build to complete and I like that. I will evaluate where I stand and hopefully get both fuselage halves together today.

Exhaust Stains

The F-15 & F-16 are coming along very slowly as of late. The little detail projects have become tedious and a massive time killer. The F-15’s external stores have been conquered but upon attaching the rack for the Litening Pod, the same issue arose as with the other racks. I feel like Mark Watney (Matt Damon) in the movie “The Martian”. At the end he says that “if you solve enough problems, you get to come home”. That sums up this build for final assembly. The new problem will get filled today and shaped up tomorrow.

While all the annoying wrinkles are being ironed out, I worked on something simple to ease my mind. Both airplanes’ exhaust cans were addressed this morning. The F-16’s saw some assembly get finished up before being attached to the fuselage. The F-15 just got a little weathering. It’s all about little victories at this point.

Birthdays and Model Building

Getting older isn’t ever the greatest of events. To make that disaster a little easier to swallow, we get distracted with presents! Yay! So for my 38th birthday this year, my wife and kids got me a fabulous gift.

When my Badger airbrush finally went kaput last year, I was left with my hands in the air scrambling to find a solution so I could finish up some painting. My Dad’s airbrush served as a loaner until I purchased my Aztek. That experience led me to the conclusion that I needed a two airbrush workbench. That conclusion came to fruition with the Iwata Neo. The trigger style airbrush has been debated, and going against all negative feedback that I have read about them, I bought one. I haven’t had a chance to test it out yet but it feels more natural with the trigger. I am really excited to get some paint flowing through it.

So with another airbrush added to the workbench, I needed to add another air line for easy access to both guns. That was easy enough after a trip to Menards for some supplies. With a “T’ and two shut-off valves, we are all set.

The F-15 was back on the workbench with the racks getting their filler. It was easier than I had originally thought so I am hoping the rest will be the same. I will give it a delicate sanding and evaluate if I need to add anymore filler. After I get past this hiccup, I can finish up final assembly.

With the F-15 in repair, the F-16 saw some weathering get finished. Since this is a Tiger Meet scheme, I kept it relatively clean. My next steps are to get the various blisters painted and affixed. Final assembly is right around the corner.

The Let Down

While the weekend didn’t pan out like I had hoped for, I did get some quality work accomplished. The F-15 wouldn’t have been finished anyway, due to the ordnance not getting finished. Another, more delicate, issue arose during final assembly. The external stores attached to the conformal fuel tanks refused to fit well. With some sanding and trimming, I made them workable. They will need to be filled, unfortunately, before I can call this build finished.

On a positive note, the landing gear and bay doors are attached and the aircraft is on its feet. There are some added efforts to knock out now and I am really not super concerned with them. I will focus on a steady fix and keep working towards finishing this build up soon.

Decals were the pressing matter of the weekend and I finished them up this morning. The F-15’s ordnance were main priority so they were addressed first. After they were all finished up, I shifted over to the F-16. There wasn’t much more to finish with a minimal second half of decal application. It will be out to the garage from here for some dullcote. Depending on how extensive my fix is on the F-15, the F-16 may move into the top slot to be finished.

Weekly Update

My weekly output has been focused mainly on finishing up the F-15 build. With my work schedule sucking up more free time lately, I feel that adding anything else would be disastrous. The time that I have been able to dedicate to the F-15 has been miniscule, but I have been able to take some huge steps towards completing this kit.

Weathering the F-15 slotted in as my main goal for the week. That was dutifully accomplished Tuesday evening and then it went out to get all sealed in with clear matte. From this point on it will be all final assembly and touch-ups.

My other minor accomplishment was to get the ordnance glossed for decals. This should have been addressed weeks ago but here we are. Decals will be a joint effort with the rest of the F-16’s decal application. Two birds with one stone. I am hoping for a weekend finish here with the F-15. Maybe a Monday finish with the F-16?

Happy Easter!

Happy Easter everyone! It’s a sunny morning here at Amateur Airplanes and I am thrilled to report that all is well at the workbench. With the A-10 finally finished, I can start focusing on finishing up the F-15 and F-16 builds. Remember those two? Yeah, it’s been a while. Logically, they should have been finished weeks ago. In Amateur Airplanes time, they’re right on track! Seriously though, they just need their remaining decals applied, weathering, and final assembly. Not much at all.

The F-15 took its turn yesterday afternoon getting the rest of its decals applied to the aircraft. It made its way out to the garage for some clear matte this morning. Weathering will be next. Ordnance, external fuel tanks, Litening pod, and Navigation pod will get glossed today and taken care of tomorrow with the F-16.

National Air and Space Museum

My list of airplane related museums is long and seemingly impossible to complete. The venues here in the States are attainable and not too much of a worry to cross off my list. The ones across the pond are going to be the difficult ones. At the very top of my list was The National Air and Space Museum. With my Spring Break trip to Gettysburg, we took a day trip to Washington D.C. to check out the sights.

Before we planned on going to D.C., I never knew that Air and Space was two separate museums. The main one is among the rest of the Smithsonian museums in the National Mall while the Steven F. Udvar-Hazy Center is a traffic filled drive located at Dulles International Airport. My son and I did both. There is no way that I could be that close and not make the drive. My love of aviation runs deep.

National Air and Space Museum

My expectations may have been a little too high because I was a little disappointed. Please don’t get me wrong here, there is plenty to look at and it’s worth the visit when you combine it with the rest of what Washington D.C. has to offer. My main beef is that the exhibits are all basically cramped into small rooms that really can’t facilitate the mass of visitors. With the Wright Flyer, Spirit of St. Louis, and the Bell X-1 on display here, it was a must for me to go. I am a sucker for historic airplanes.

Steven F. Udvar-Hazy Center

This was more up my alley and I felt a sort of redemption while walking inside. This is your traditional, hangar filled with airplanes museum. If you had to choose one to go to, this should be your choice. The collection was a fantastic blend to satisfy anyone. The Enola Gay was really the main reason for the visit but seeing the space shuttle Discovery really was a show stopper.

Spring Break

Well it’s Spring Break, again and this year the Amateur Airplanes workbench has traveled to Gettysburg, PA. There is quite a bit more to do than I had thought so my build time has dwindled. We’ve been here since Saturday and today was my first chance to unpack the Focke Wulf, P-70, and F-22.

The Focke Wulf was first up with the engine cowling getting wedded together and the lower half of the wings being attached to the fuselage. I plan on getting the tops of the wings attached before I do anything else. From there will be all the filling and sanding.

The P-70 and its’ gap issues were next up with a gallon of filler added. Not really but there will be a lot to be applied in many future sessions. I used Testors filler to get the gaps filled in. When I sand that down, I will apply some Tamiya filler for the rest of the time.

Preparation was not the name of the game when packing the F-22. I forgot to pack a  rattle can of flat white for some more preliminary painting. That aside, I was able to work on the cockpit and get it installed. The ejection seat will need some added details so I will install it at the end of the build. Hopefully I can find a hobby shop so I can grab some paint today. I’d like to get those parts painted and installed on this trip.